PACS Workflow
Comprehensive guide to PACS system workflow including setup types, image annotation, report integration, and viewer options for medical imaging management
PACS Workflow Overview
The Picture Archiving and Communication System (PACS) workflow encompasses the complete lifecycle of medical imaging from study acquisition to report generation and image management. This guide provides a detailed overview of the workflow components and integration points.
Workflow Integration
CrelioHealth PACS workflow integrates seamlessly with the Radiology devices
- Patient Registration: Bill registration at CrelioHealth and worklist to device
- Study Acquisition: Imaging modalities capture and transmit studies
- Study Annotation: Annotating observations on the study scans
- Report Generation: Clinicians create reports with integrated annotations
- Storage and Retrieval: Images and reports are archived for future access
System Setup Types
PACS systems can be configured in different architectural setups depending on the healthcare facility's requirements and network infrastructure.
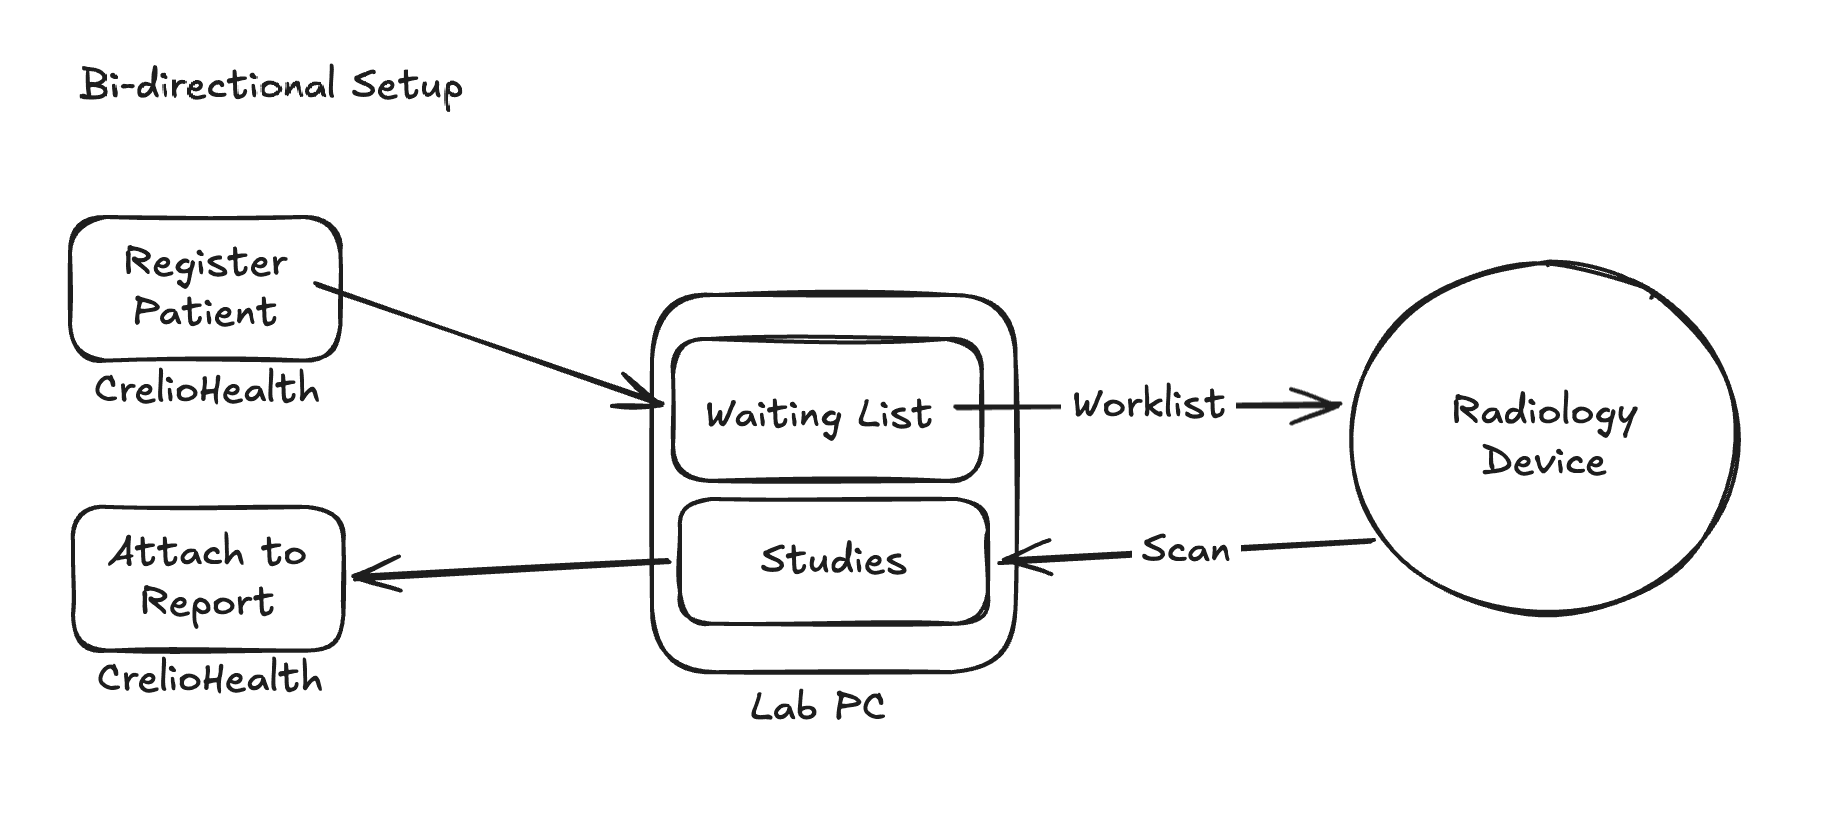
Bi-Directional Setup
In a bi-directional setup, the PACS system maintains continuous two-way communication between the imaging modalities and the central server. This allows for:
- Real-time image synchronization
- Immediate work list availability
- Automatic backup and redundancy
- Seamless integration with multiple imaging devices
Uni-Directional Setup
A uni-directional setup provides a simpler, one-way communication flow from imaging modalities to the central server. This configuration is suitable for:
- Smaller healthcare facilities
- Standalone imaging centers
- Devices without bi-directional support
- Cost-effective implementations
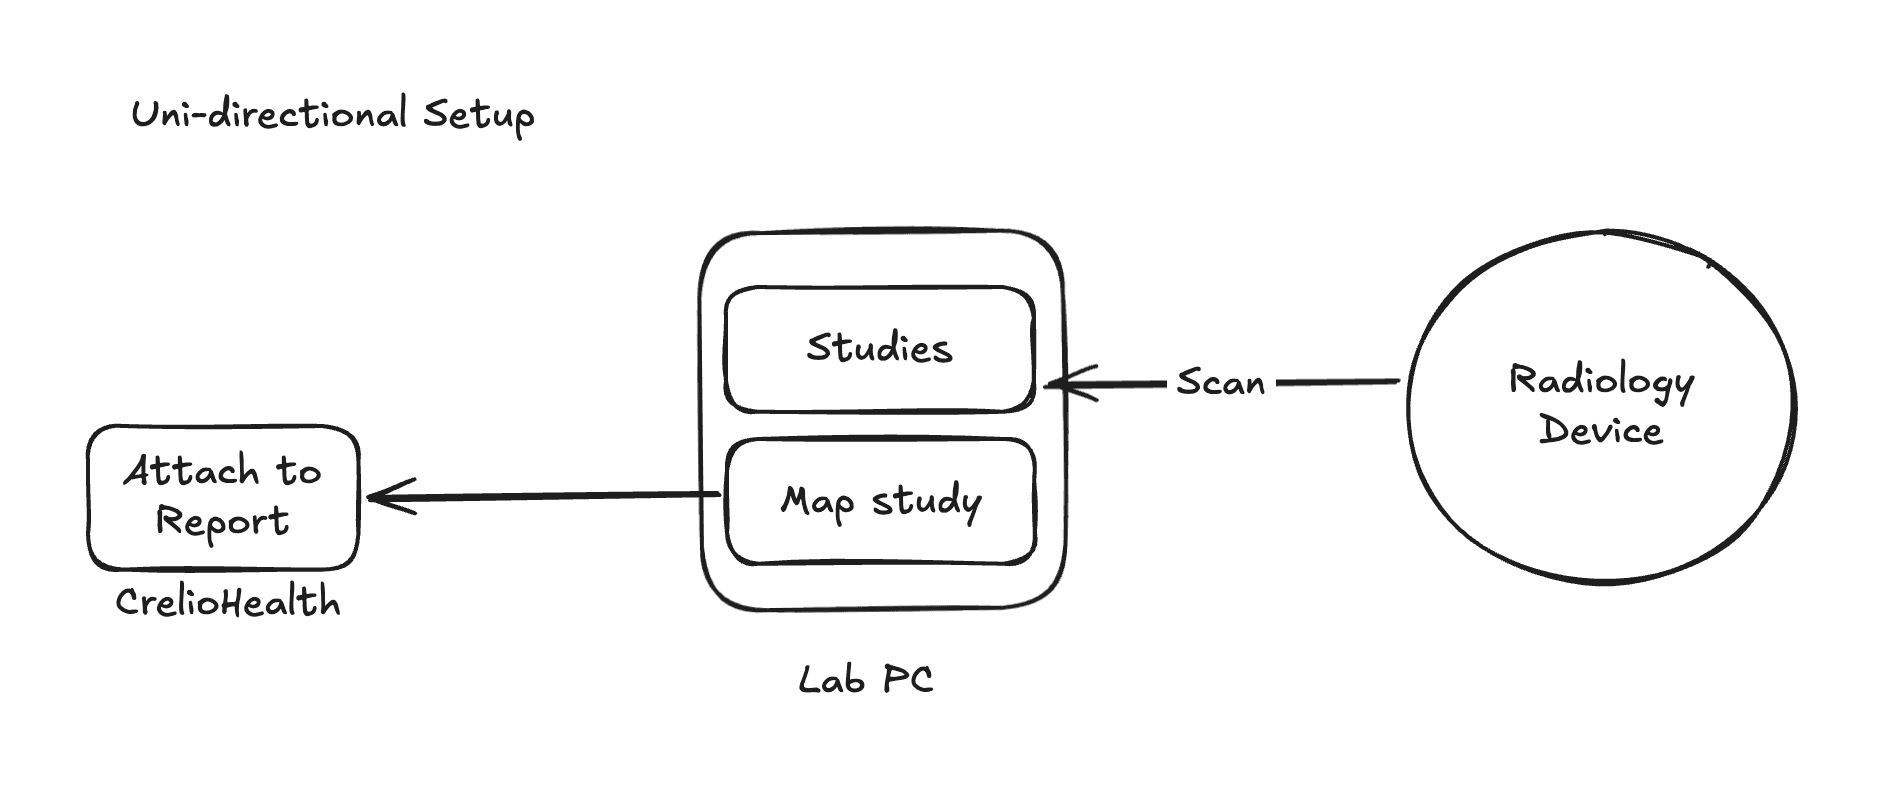
Image Annotation and Documentation
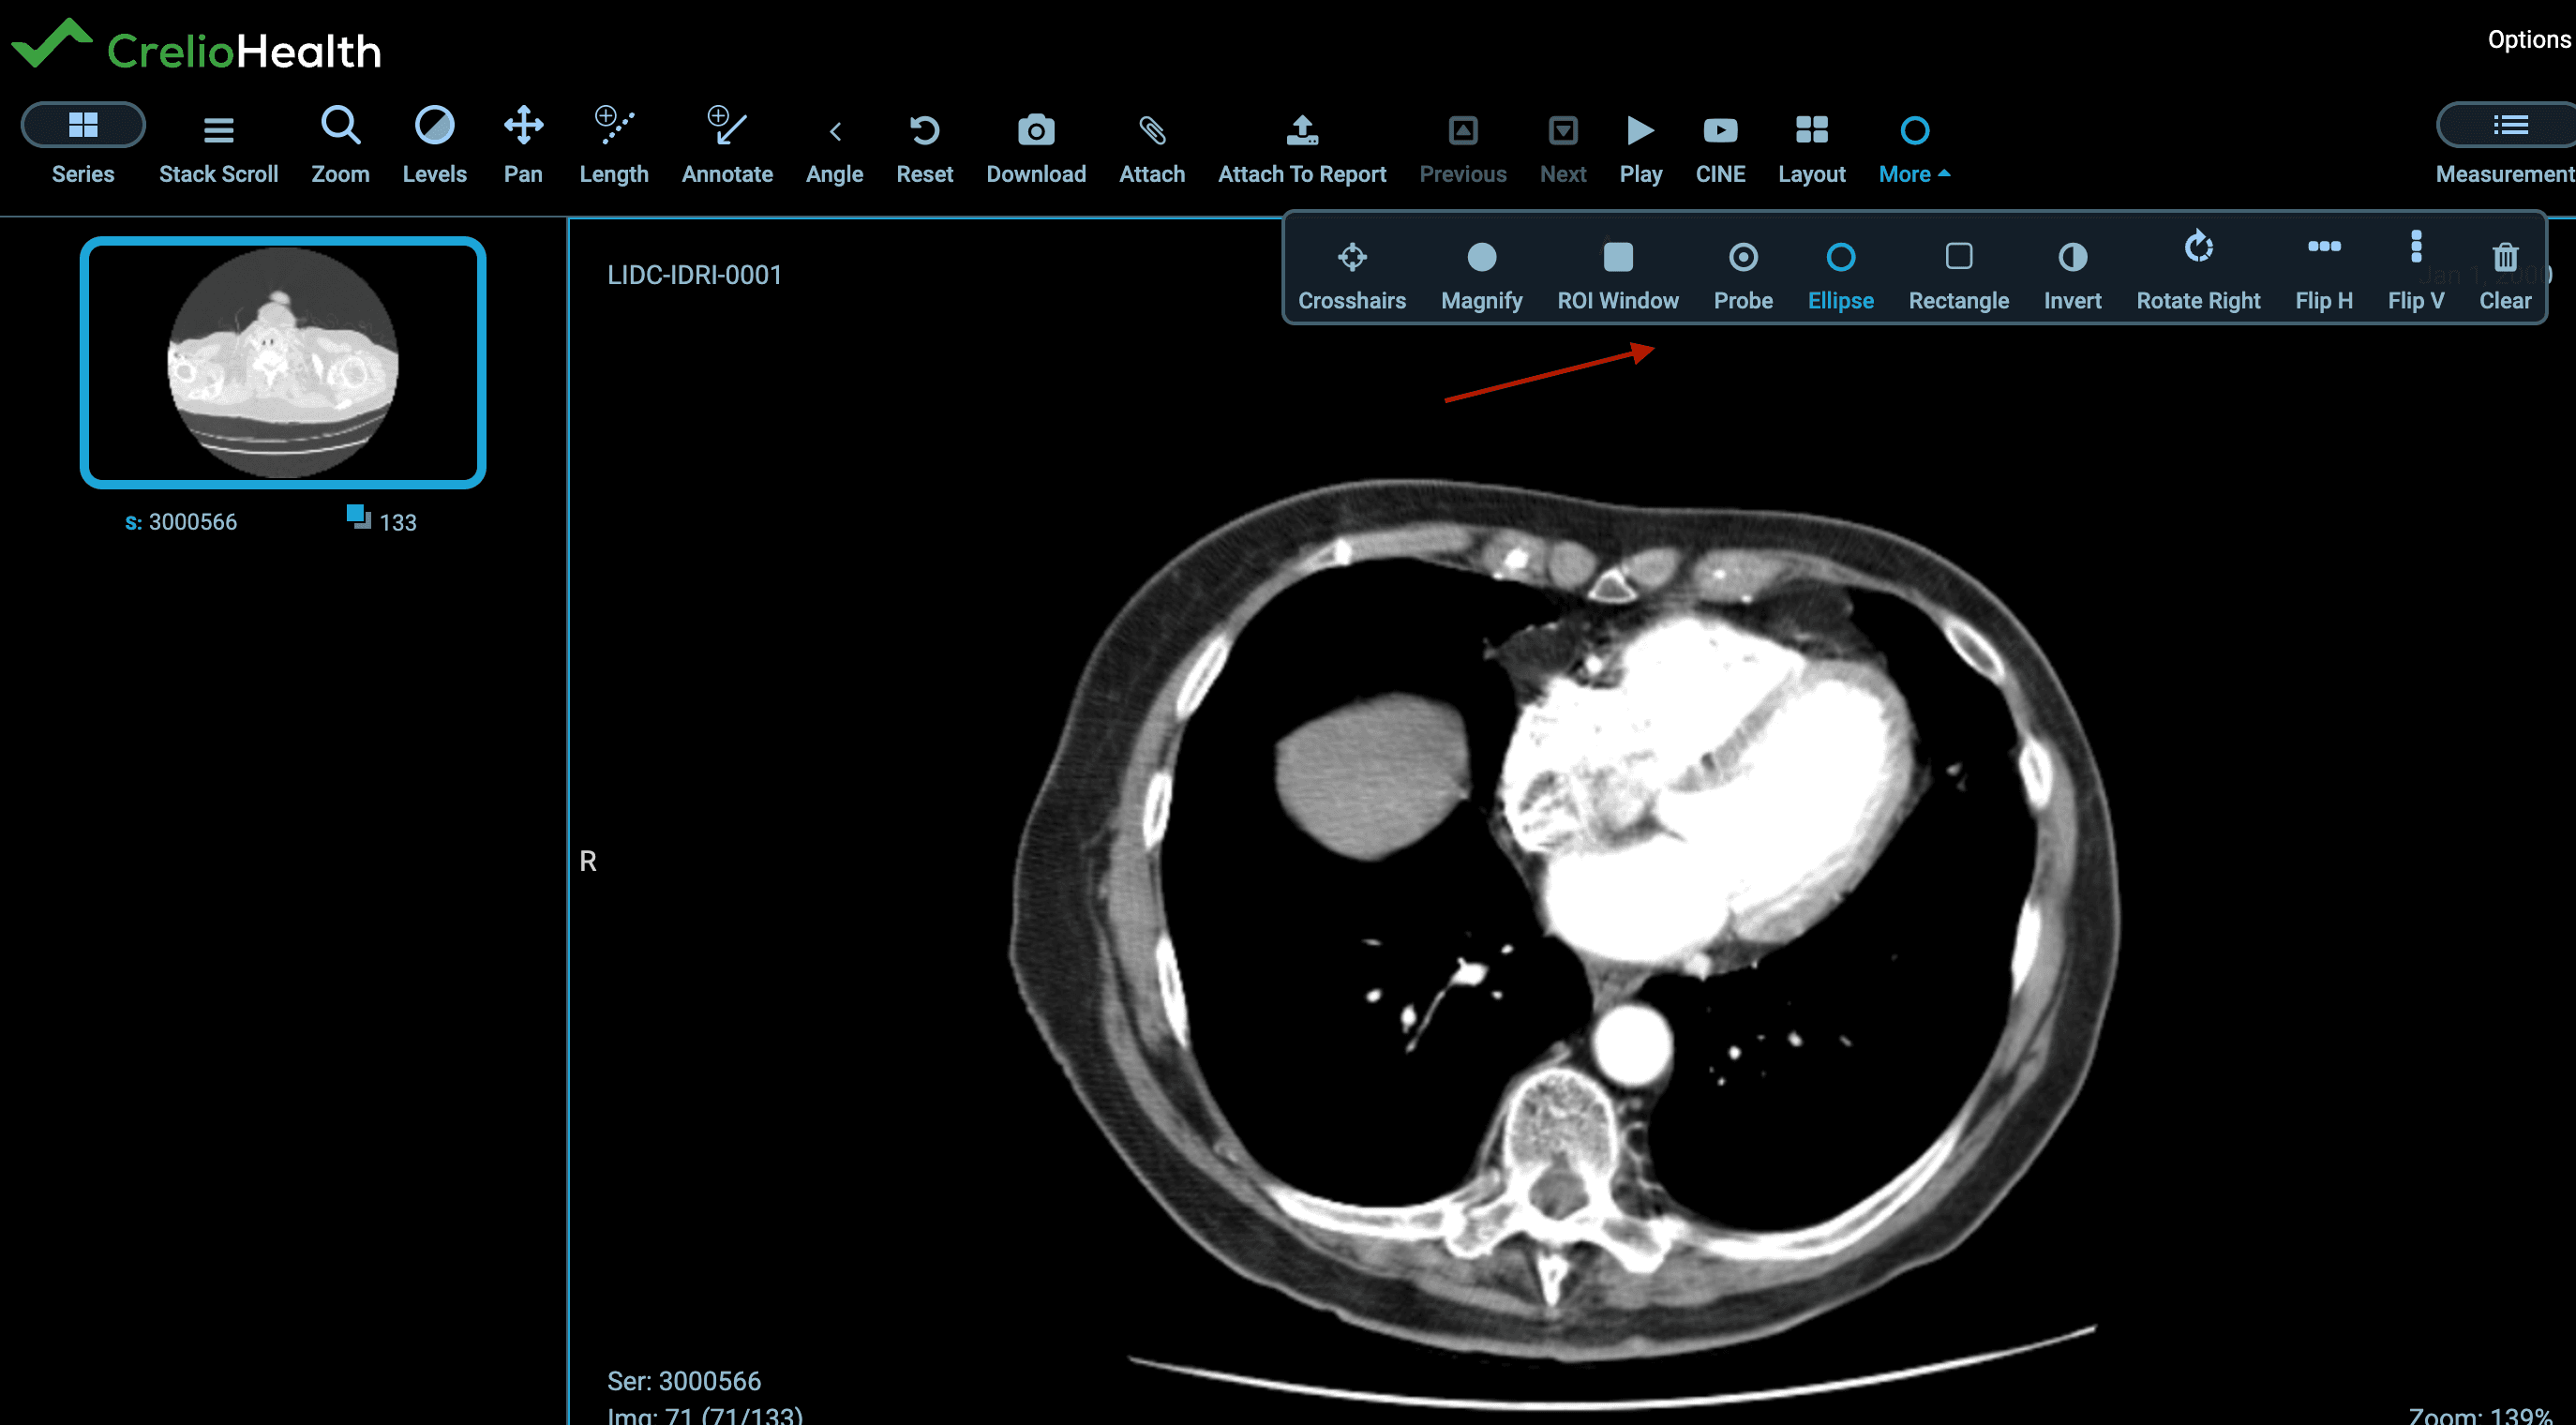
Annotation Tools
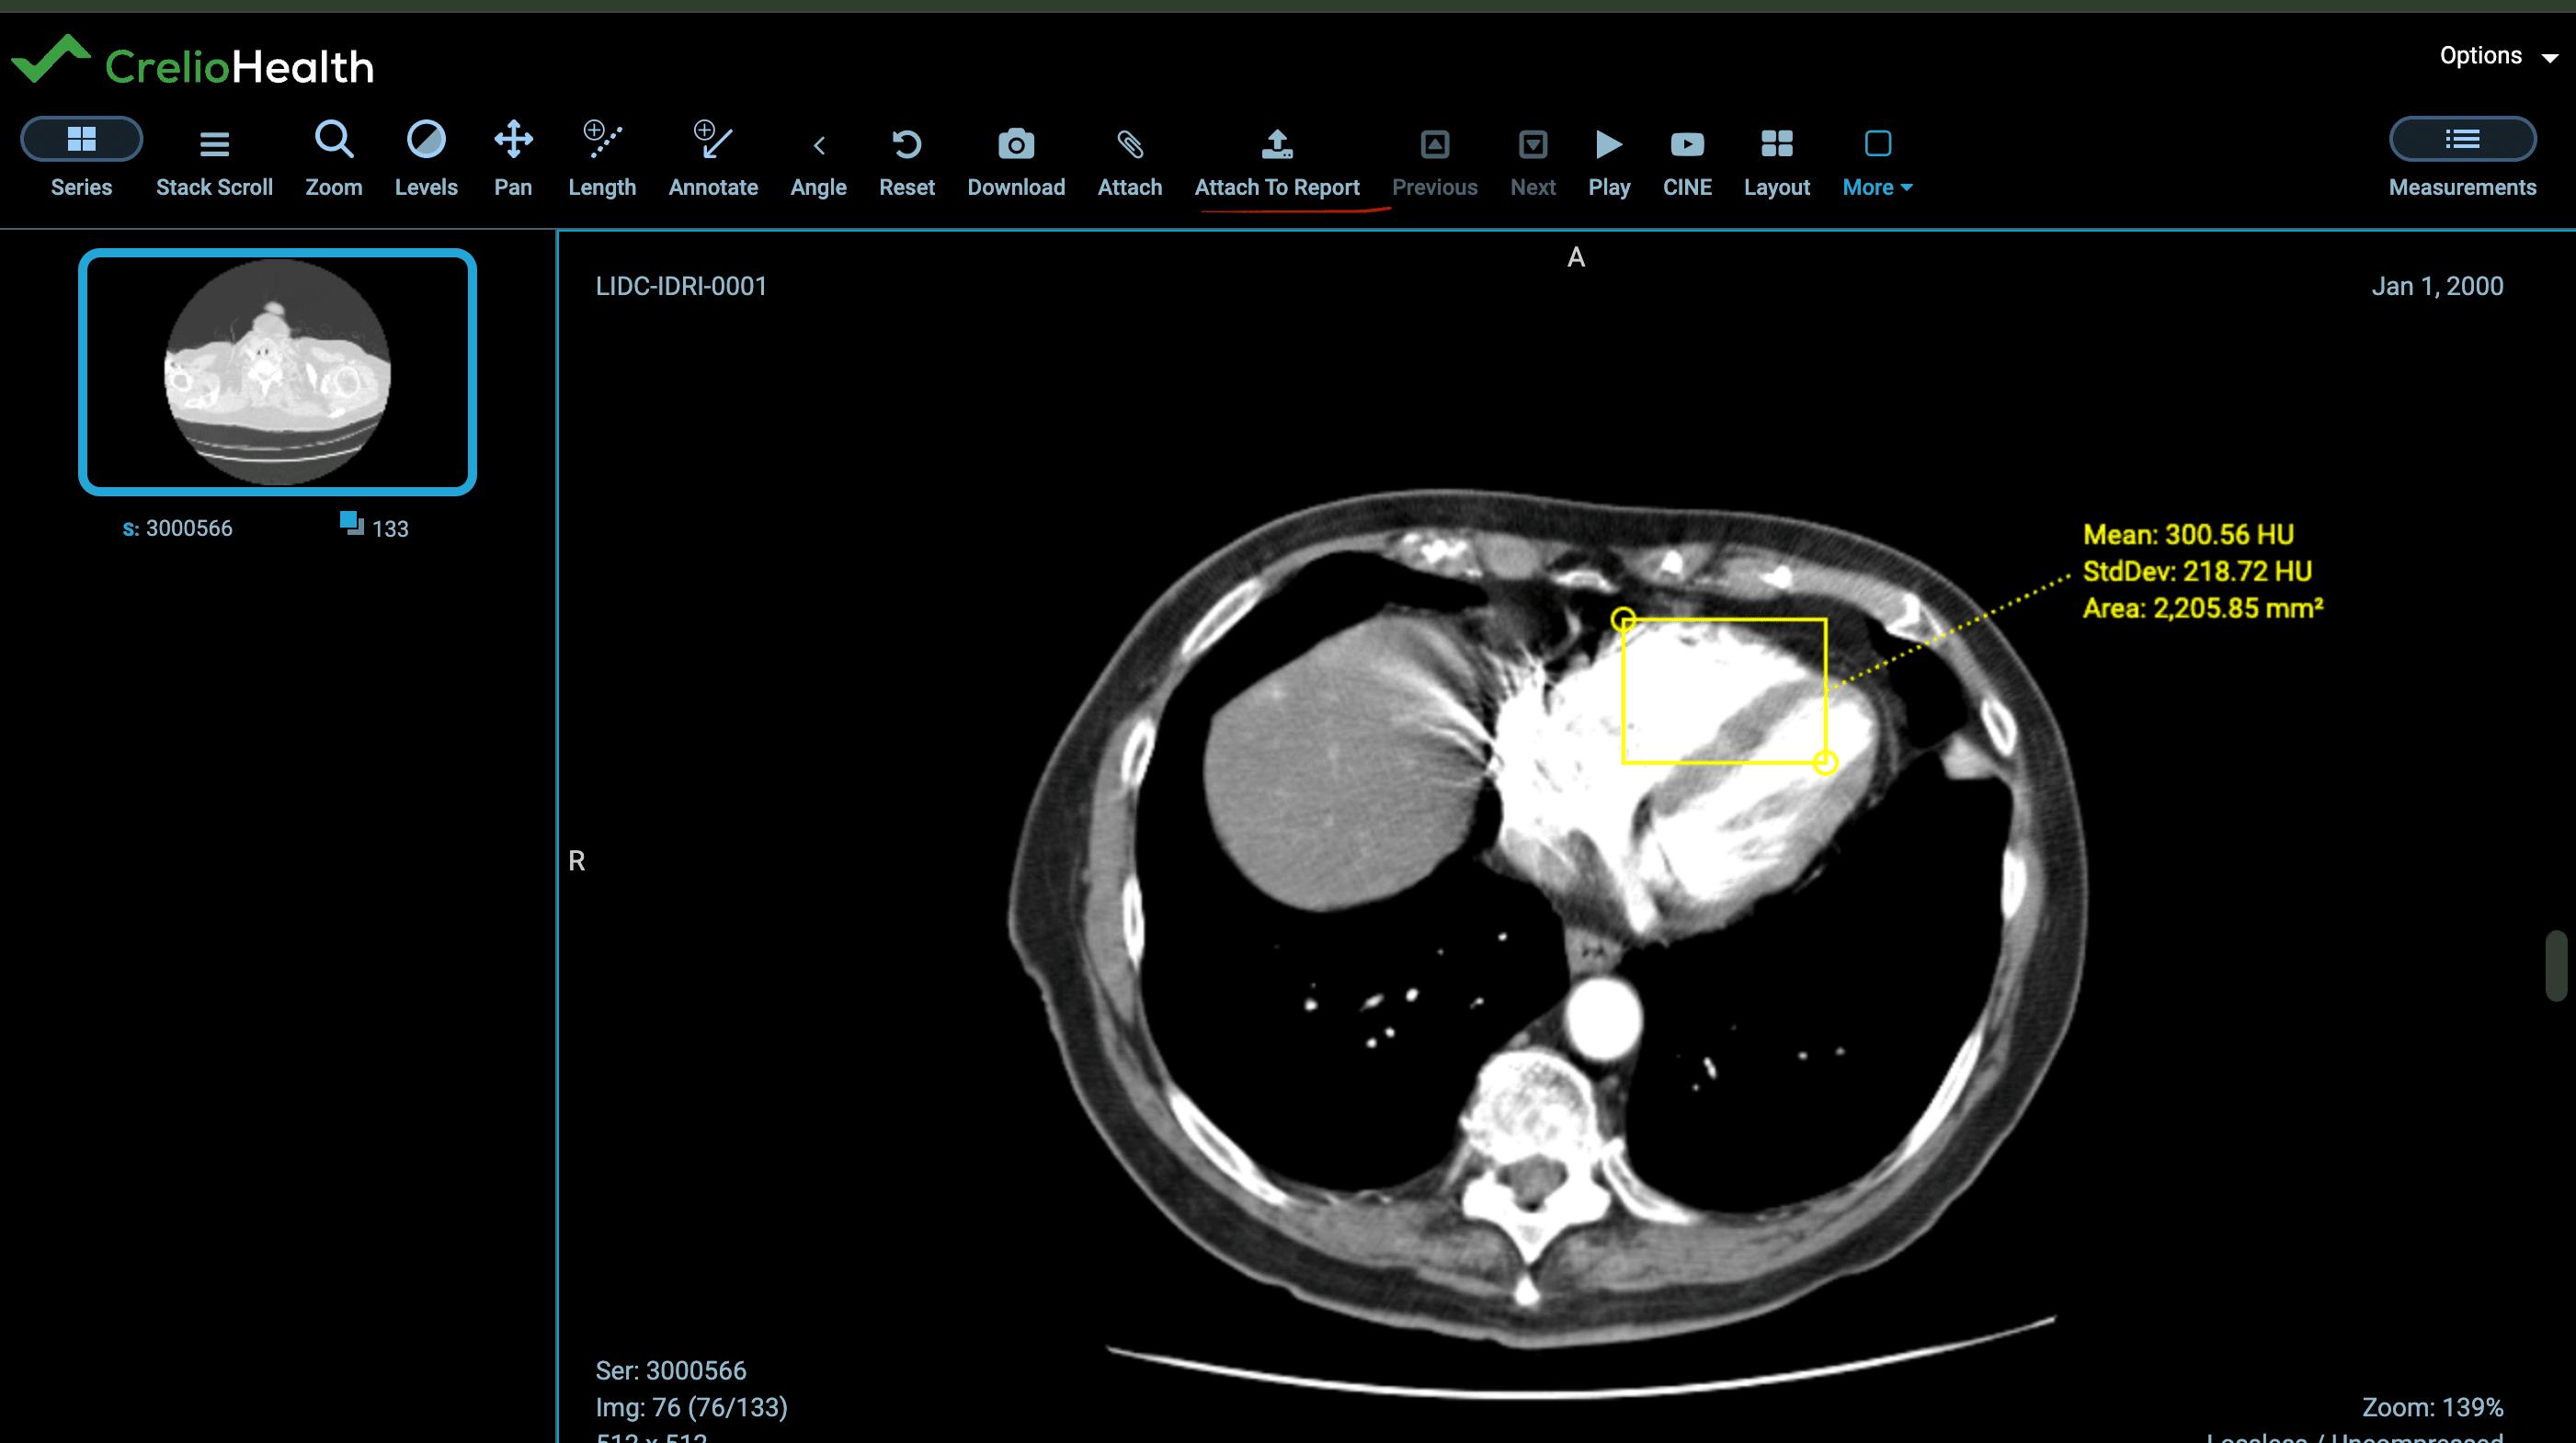
The PACS system provides comprehensive annotation tools for medical professionals to mark and document findings directly on medical images:
Attaching Screenshots to Reports
The workflow for attaching annotated images to clinical reports involves several steps:
- Select Annotation Tool: Choose the appropriate annotation tool for the specific finding
- Mark the Image: Apply annotations, measurements, or highlights to the medical image
- Capture Screenshot: Save the annotated image as a screenshot
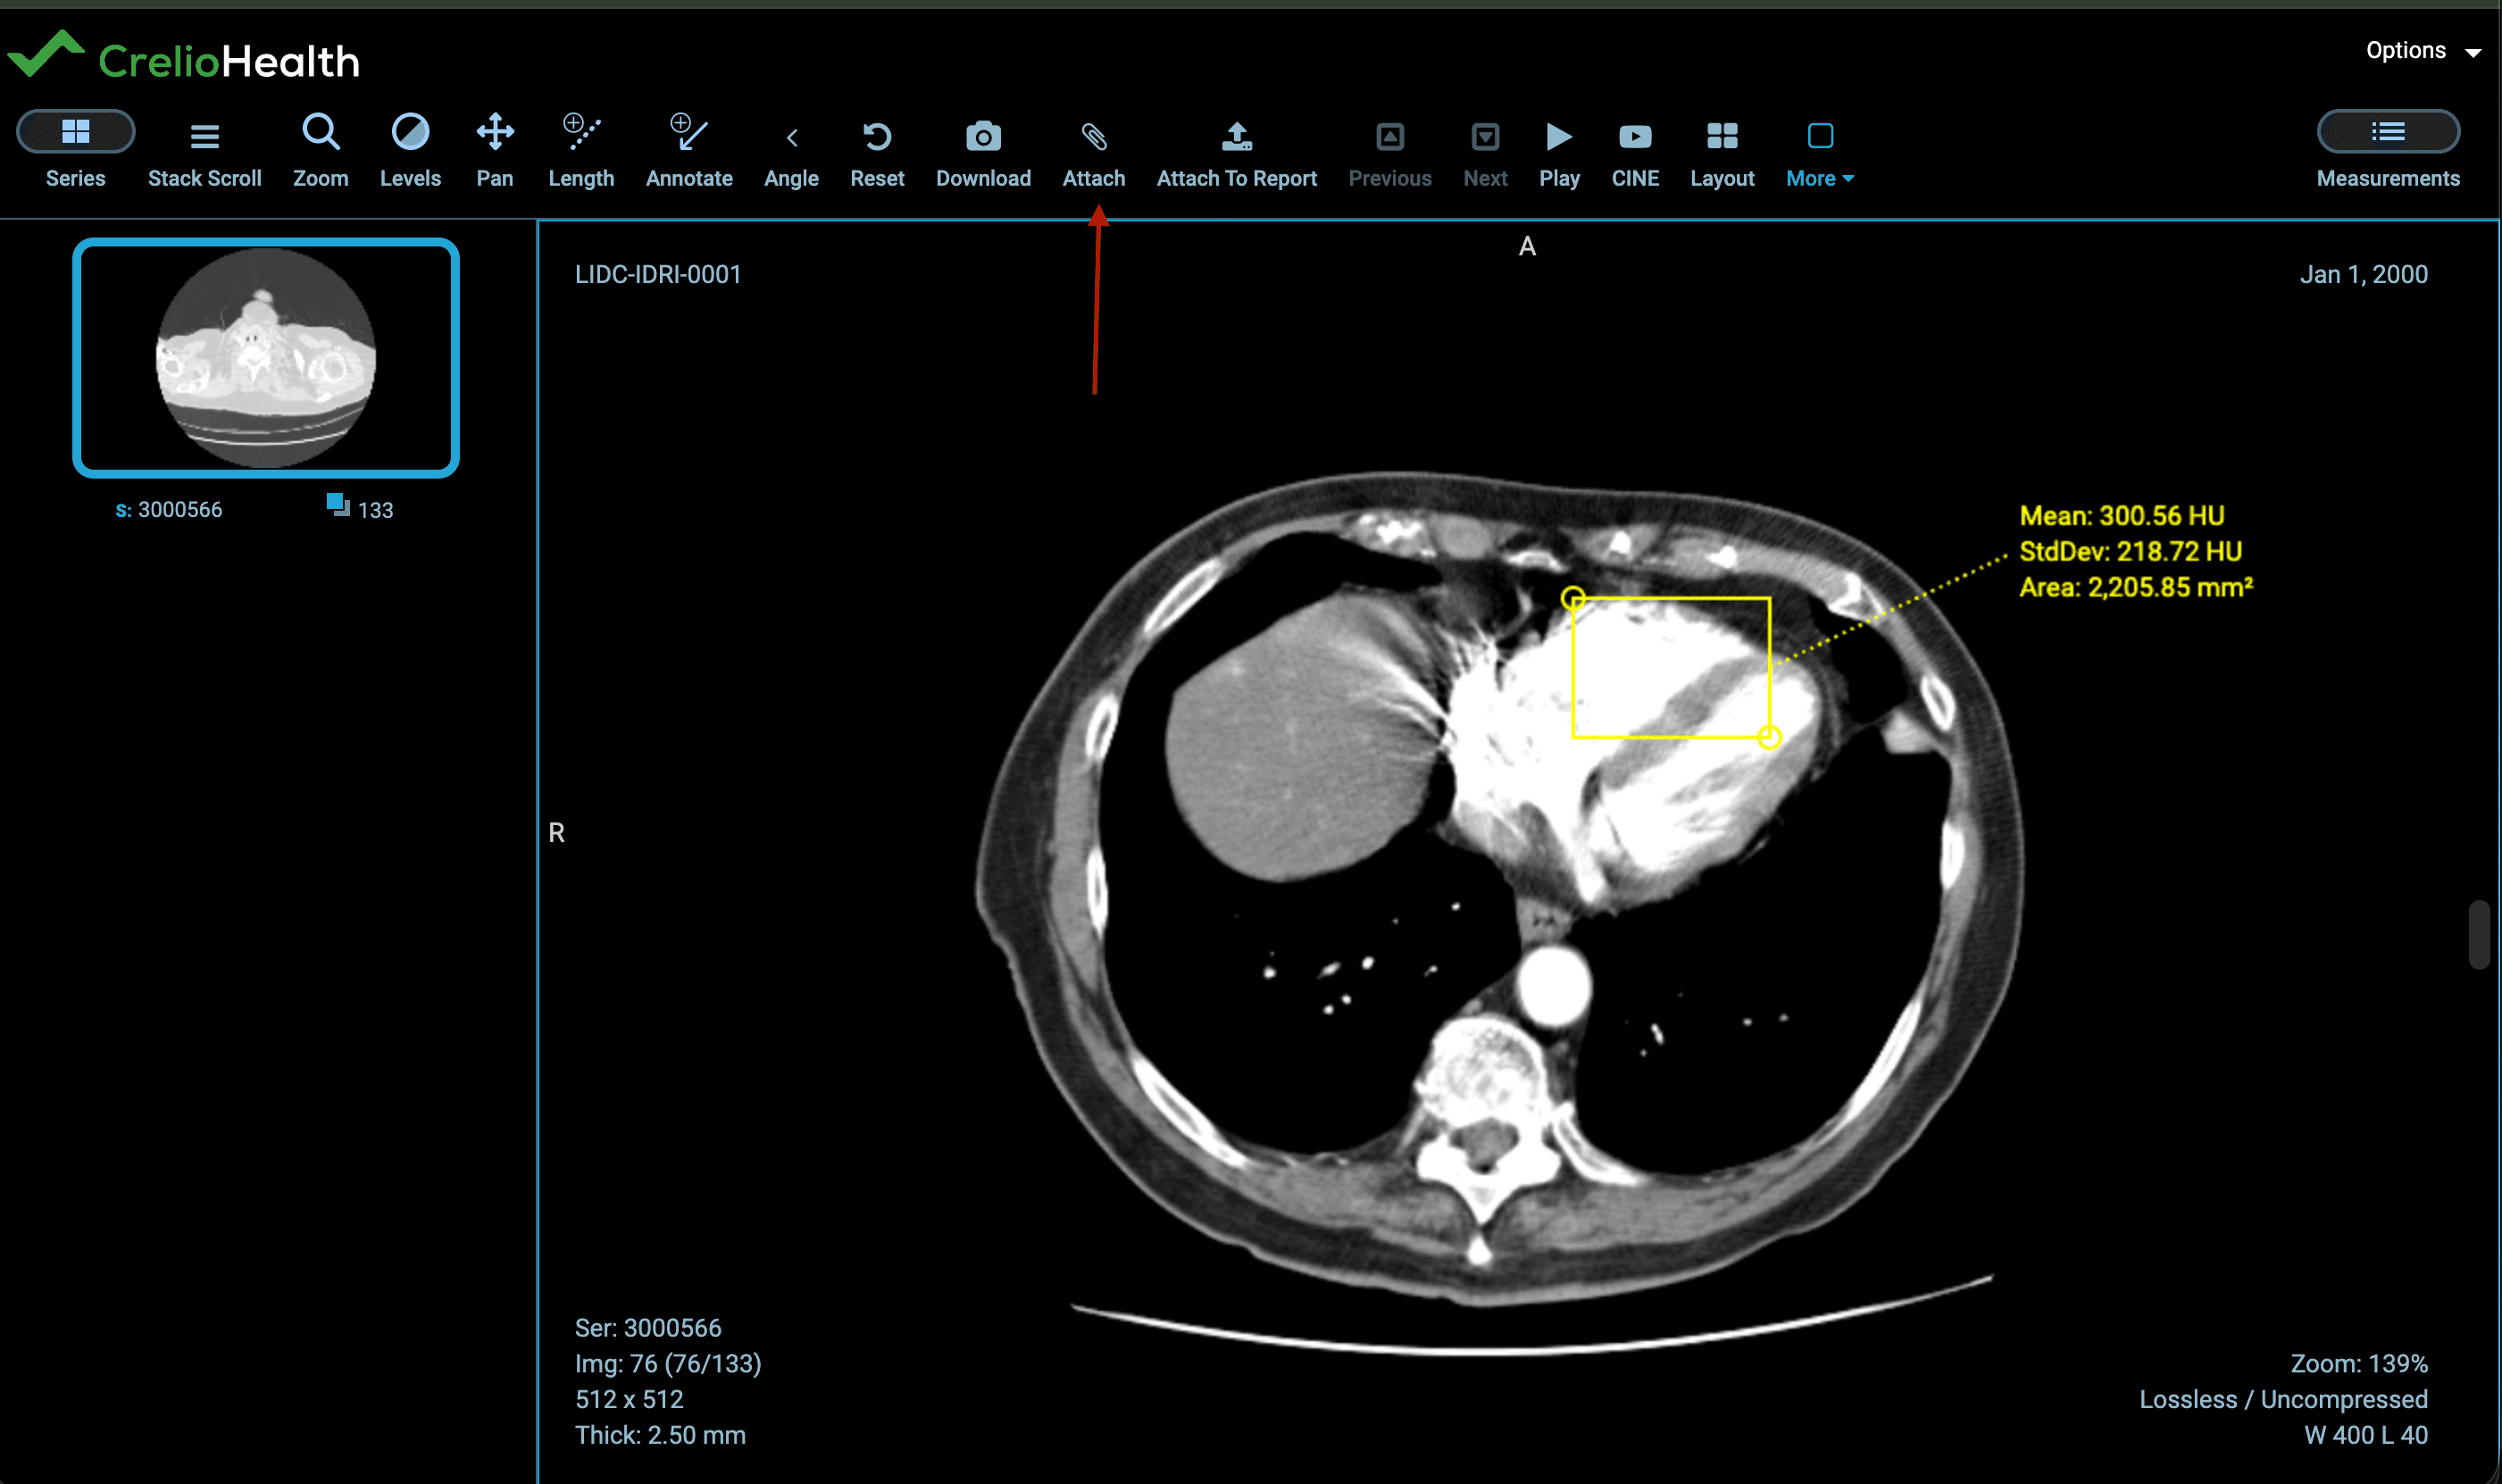
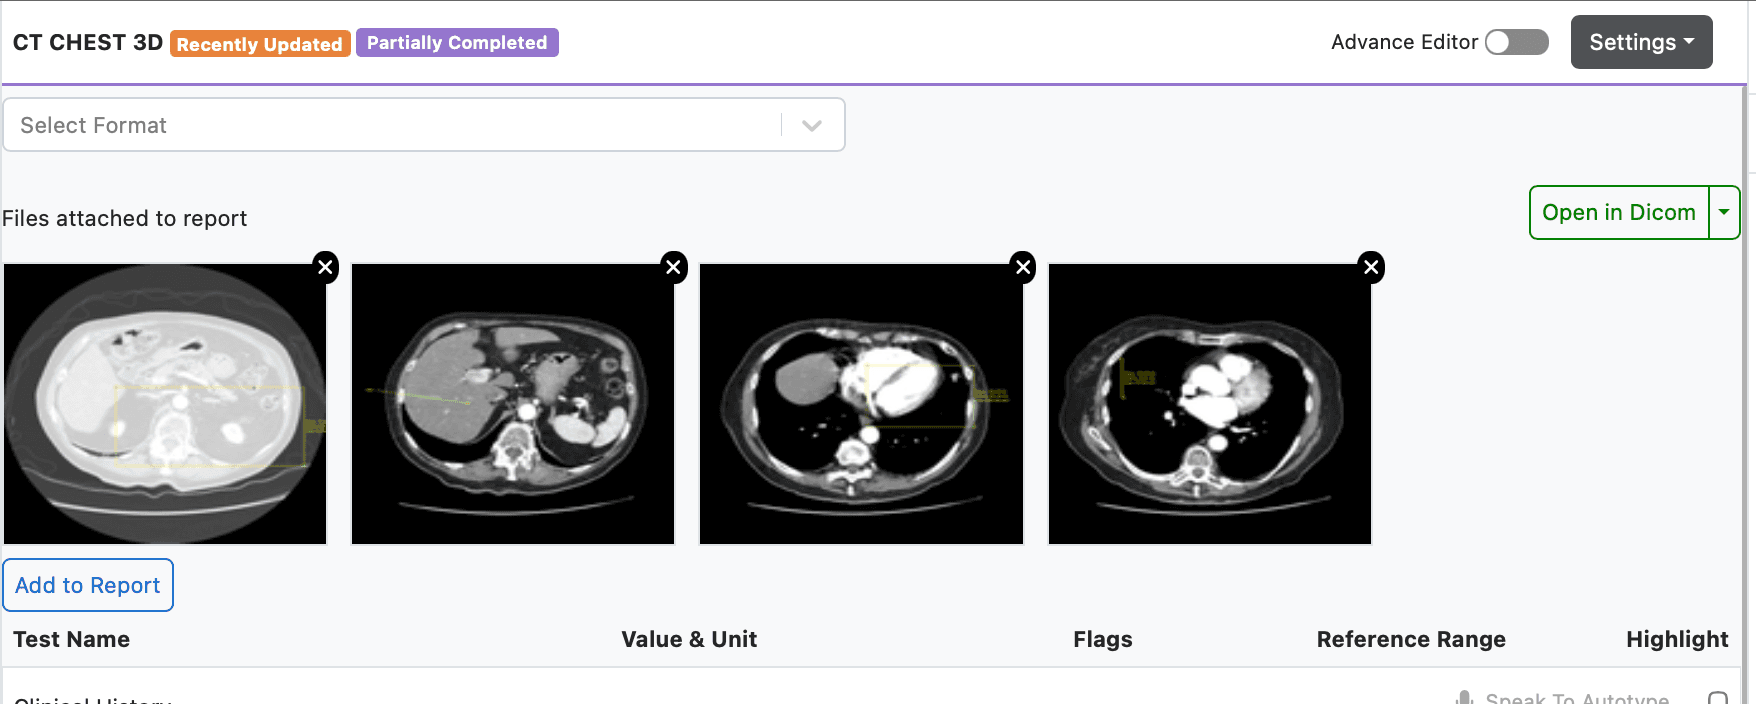
Final Report Integration
Once annotations are attached, they can be attached to the report.
- Attach to Report: Link the annotated image to the corresponding clinical report
Report Access and Visualization
Accessing Annotated Images
Clinical reports with attached screenshots provide detailed documentation for medical reviews:
- These can be accessed from Operation -> Waiting list module
Detailed Large View
These screenshots can be zoomed in for more clarity and viewing annotated areas for detailed examination:
- Click on the screenshot image to zoom in
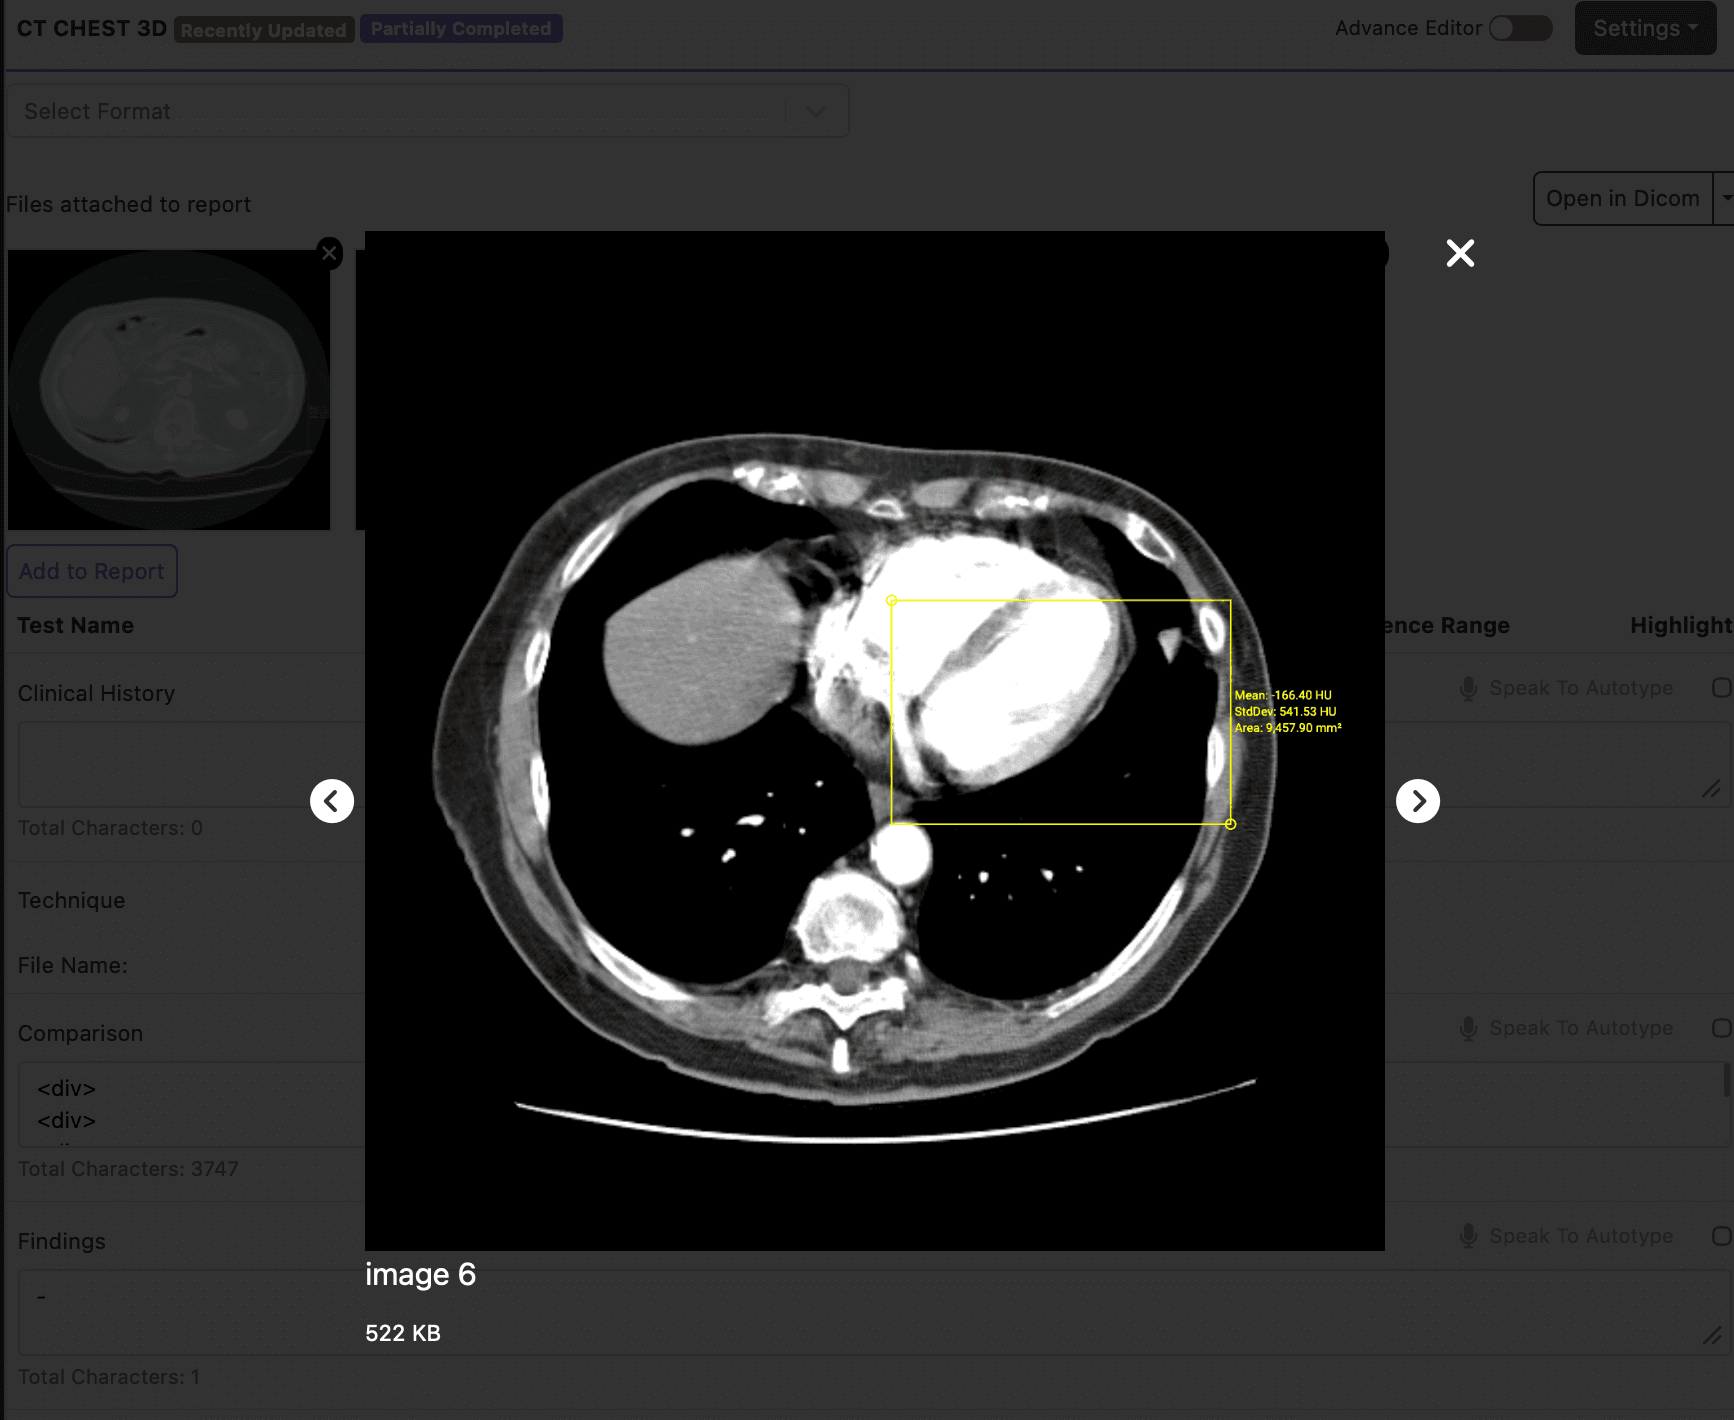
Image Viewer Options
The PACS system offers multiple viewing options to accommodate different clinical needs:
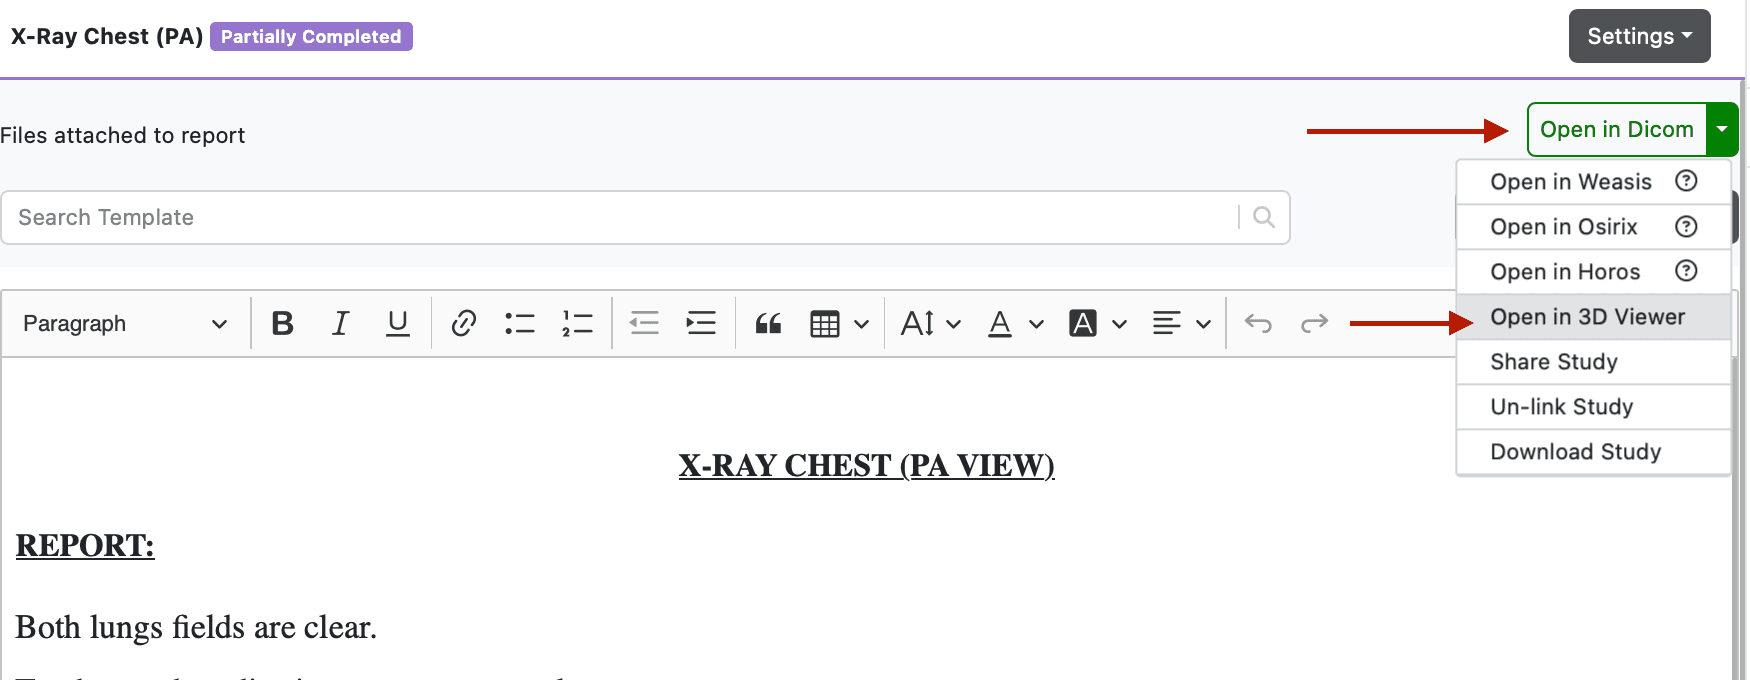
Viewer Features
- Multi-Format Support: View DICOM, JPEG, PNG, and other medical image formats
- Windowing Controls: Adjust brightness, contrast, and window levels
- Measurement Tools: Take precise measurements on images
- Series Navigation: Browse through image series efficiently
- Annotation History: Track changes and annotations over time
This comprehensive workflow ensures efficient medical imaging management while maintaining high standards of clinical documentation and patient care.